Monday 30 September 2013

Nanaimo Bars, and Some Canada Love


I  came across this bit of Canadian humour, and it made me think of all the things I love about this country, which invariably led me to thinking about food.  Canadian food, like Poutine and all things maple syrup.  And Nanaimo Bars.
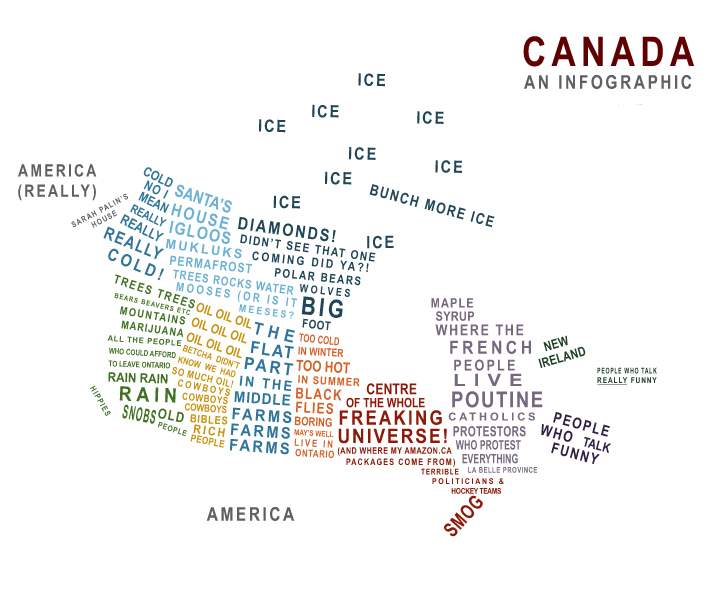

So.  It would seem that I live in the centre of the whole freaking universe.  Be that as it may, I have an abiding love for all things west coast, having spent 5 years living in Victoria, BC.   Last year I shared a recipe for my favourite cheesecake, from my favourite Victoria restaurant.  It is truly the best cheesecake I've ever eaten.  Just like these Nanaimo Bars are among the best bars I've ever had.  They've always been one of my favourite sweet treats, and coincidentally also come from Vancouver Island.  Nanaimo, obviously.


If you've never had a Nanaimo Bar, you don't know what you're missing.  A cocoa-coconut-crumb crust, a creamy custard centre, finished with a smooth semi-sweet chocolate layer.


These are no-bake bars, but they require some refrigeration time.  The exact origin of Nanaimo Bars isn't known, although the earliest print copies of the recipe date back to the 1950's in various Nanaimo area publications.


Give these a try, I think you'll love them.  And if you ever find yourself in Nanaimo, you can tour the Nanaimo Bar Trail.

Nanaimo Tourism

Nanaimo Bars

Bottom Layer

½ cup unsalted butter
¼ cup sugar
5 tbsp cocoa
1 egg beaten
1 ¼ cups graham wafer crumbs
½ cup finely chopped almonds
1 cup finely shredded coconut

Melt first 3 ingredients in top of double boiler. Slowly add egg and whisk constantly to cook and thicken. Remove from heat. Stir in graham crumbs, coconut, and nuts. Press firmly into an ungreased 8" x 8" pan.

Second Layer

½ cup unsalted butter
2 tbsp plus 2 tsp cream or milk
2 tbsp vanilla custard powder (or vanilla pudding powder)
2 cups icing sugar

Cream together butter, cream, custard powder, and icing sugar until smooth and creamy. Spread over bottom layer and refrigerate until firm.
Third Layer

4 squares semi-sweet chocolate (1 ounce each)
2 tbsp unsalted butter

Melt chocolate and butter over low heat in a double boiler. Cool slightly but allow to remain liquid. Pour over second layer and chill in refrigerator until set.  Cut into squares.


Amazing bars, and an amazing city in a beautiful part of the country!
Source: Tourism Nanaimo

Linked up here:


Thank you for featuring me!


Olives-n-Okra God’s Growing Garden   Ashley's Dandelion Wishes   Get Inspired With Us Pinning Party!  Sweet and Savoury Sunday Do Tell Tuesday  Mila's Little Things

Monday 23 September 2013

Hello Autumn

It's officially autumn, as evidenced by the new chrysanthemums that now fill our patio urns.  Last week saw the first frost of the season, which took care of the petunias and geraniums that flowered in them all summer long.


For the most part it's still warm, despite a few cold and rainy days, and the leaves have just barely begun to change colour, so it's easy to hang on to a summer state of mind.  But like it or not, fall is here.  It's in the Pumpkin Spice Lattes at Starbucks.  It's in the all the red, brown, and orange shades taking over the store displays.  It's in the sweaters and boots that are slowly replacing sandals in the hallway... and the cinnamon candle I suddenly feel like burning as the days get shorter and the nights colder.  I will miss summer, no doubt about it, but there are a few things about this time of year that I love.

Like the start of hockey season.


At the rink is one place I'm very happy to be.  Happy fall y'all!


Thank you for featuring me!

Photog Show and Tell - I was featured!!!

Monday 16 September 2013

Back to School, Busy Night Casseroles, and a Basic White Sauce


It’s September.  The kids are back to school and hockey is back on the calendar.  The weekend before school started I made the mistake of asking the kids to clean their rooms.  I ended up with eleven loads of laundry.  


Someone needs to kick my photo-a-day-arse because I've been missing plenty of photo opportunities despite the charming capture of Laundrygate.  I managed the obligatory back to school photos, four out of six anyway... although I find as the kids get older they get decidedly more scowly.  


I'm getting up earlier to pack lunches, and discovering that it's still dark... which strikes me as the most depressing thing about fall.


I know there's plenty to love about fall, but right now I'm in an end of summer funk.  


As hard as it is to let summer go, it’s time to welcome some structure and routine back into our lives.  A big part of that is dinnertime.  Something nourishing, and on the table shortly after everyone gets home from work and school, yet quick and easy enough for the nights when we’re heading right back out the door.  I’ll often throw together some kind of a casserole, combining meat, veggies, and grain or pasta… making it up as I go along.  Unfortunately, many casserole recipes call for some version of a creamed soup in a can.  I’ve used them in the past, and I’d be lying if I said I’d never use them again (our favourite tuna casserole depends on cream of mushroom soup), but I've come up with a slightly less convenient, healthier option which I have been using more and more often.

I'm sharing it with you, because I know I'm not the only casserole lover out there that wants to kick the canned soup addiction.  It's not exactly a recipe... more a basic framework that's easily modified based on what's in the fridge or cupboard.

It's a super simple, basic white sauce.  I started making this as a pasta topping when the cost of the fresh Alfredo sauce at the grocery store crept past the $10 mark for the two containers needed to feed eight of us.  A simple roux of butter and flour, some milk, seasonings and cheese will give you an amazing multi-purpose sauce.  


Use cream and Parmesan with a dash of nutmeg for a cheesy, creamy Alfredo.  Or Cheddar for homemade macaroni and cheese.   I recently discovered the shaved Parmesan at Costco and I am loving it... I could eat it right out of the container (okay, I DID eat some straight up), it’s that good.


Add generous amounts of basil and garlic, some cooked chicken, steamed broccoli, and cooked rice or quinoa for the casserole that comes in at a close second to our beloved tuna casserole.


This one’s also really good. Lean ground beef and onions scramble fried with Montreal Steak Spice, mix in the white sauce with some steamed green beans, and add a scalloped potato topping.  Or skip the potatoes and combine with pasta.  Delicious either way.


We do a seafood version too.  Sauteed scallops and shrimp are added to the sauce along with a bag of steamed mixed veggies and served over pasta.

The ingredient combinations are limitless, and easy to adapt to personal preferences.  Here's how I whip up an easy, multi-purpose white sauce:


Using your favourite whisk, mix up a basic roux with equal parts melted butter and flour until well combined.  This it not my favourite whisk, it's my second favourite.  My favourite whisk was nowhere to be seen and I later found it in the backyard.  I don't want to know why.  I'm glad my dishwasher has a sanitize setting.


Once the rue is bubbling and golden, slowing pour in milk, whisking constantly while it thickens.  Once you've achieved a nice smooth consistency, add some seasoning.  This is the batch that went into the quinoa, chicken, broccoli concoction so it's heavy on basil, with a dash of Worchestire sauce, some minced garlic and a dash of nutmeg.


And here's my beloved Parmesan.  Once you've seasoned your sauce you can add the cheese.  Your sauce will thicken as the cheese melts, so keep whisking and add milk as needed.  I find myself adding milk frequently throughout the entire process as it has a tendency to keep thickening even as it sits.

Basic White Sauce

2 tbsp butter
2 tbsp flour
1 cup milk
dash salt

In a small saucepan over medium heat, melt butter.  Whisk in flour until smooth and well combined.  Gradually pour in milk, whisking constantly.  Season, add more milk as needed until desired consistency is reached.  That's it!

Linked up here:


Thank you for featuring me!

 juggling real food and real life button

Monday 9 September 2013

Caves, Bridges and a Nature Hike

Before the kids started back to school last week, we finished the month of August with a day trip to the nearby Collingwood Scenic Caves.  We walked.  And walked.  And walked.  Up and down, over and under.  The caves were cool...literally and figuratively.


Of course, no cave outing would be complete without a few cool rocks to bring home, so panning we went.


The landscape needed to be seen from up high as well as from down below.


A great day of getting back to nature before getting back to school.


Related Posts Plugin for WordPress, Blogger...